How to Attach an Aquarium Background: Your Ultimate Guide to a Stunning Tank

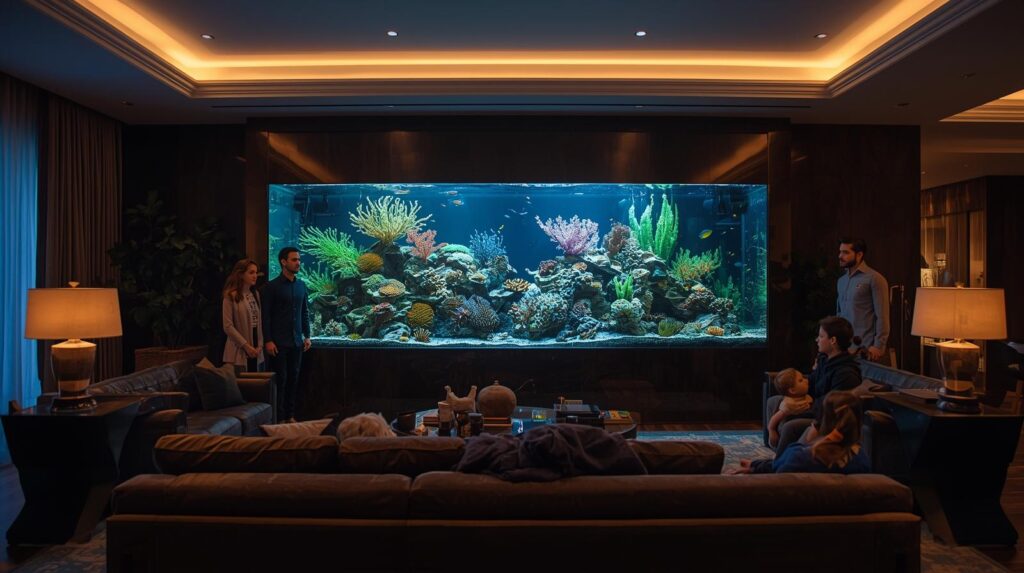
Ready to transform your fish tank into a stunning underwater world? Learning how to attach an aquarium background correctly is key to a professional-looking display. Attaching an aquarium background involves various methods, from simple tape and static cling to more permanent adhesives, all designed to enhance the visual appeal of your tank. This guide will walk you through the most effective ways to attach an aquarium background, ensuring a beautiful, seamless look that elevates your aquatic masterpiece.
What is the Best Way to Attach an Aquarium Background?

When it comes to figuring out the best way to attach an aquarium background, you’ll find there isn’t one single answer that fits every situation. The “best” method really depends on the type of background you’ve chosen, whether it’s an internal or external piece, and how permanent you want the attachment to be. However, there are a few highly popular and effective methods that most aquarists rely on.
One common approach involves using static cling technology. These backgrounds are incredibly easy to apply and remove, making them ideal for those who like to change their tank’s look often. They rely on static electricity to adhere to the glass, requiring no adhesives. Another widely used method involves special aquarium background gel or glycerin. These liquids create a clear, seamless bond between the background and the glass, often eliminating unsightly air bubbles and giving a very professional, “wet” look to the background. For a more temporary or external solution, clear packing tape or specialized aquarium tape can be effective, though they may not offer the same seamless finish as gel. Finally, for a truly permanent fixture, some backgrounds may suggest a specific aquarium background adhesive or silicone, though these are less common for standard printed backgrounds and more for 3D or custom builds.
Each of these methods has its own set of pros and cons. Static cling is great for flexibility but might not always stay perfectly flat on larger tanks. Gel provides a fantastic visual but can be a bit messy during application. Tape is convenient but can show lines or lose adhesion over time, especially in humid environments. Understanding these nuances will help you choose the ideal method for how to attach aquarium background to your specific setup.
External vs. Internal Backgrounds: What’s the Difference for Attachment?
Before diving into the nitty-gritty of attachment methods, it’s crucial to understand the fundamental difference between external and internal aquarium backgrounds, as this dictates how to attach aquarium background effectively.
External Aquarium Backgrounds
External aquarium backgrounds are by far the most common type you’ll encounter. These are typically printed sheets of vinyl or plastic that are applied to the outside of your aquarium’s back glass. The main advantage of external backgrounds is that they never come into direct contact with the tank water or its inhabitants, making them completely safe from a chemical perspective. They also stay clean from algae or debris within the tank. When you’re learning how to attach background to aquarium externally, you’ll primarily be using methods like static cling, gel/oil, or tape. The goal here is to achieve a seamless look from the outside, preventing air bubbles or light gaps that can detract from the visual effect. Since they are outside the tank, there’s no risk of affecting your water parameters or stressing your fish during application or removal.
Internal Aquarium Backgrounds
Internal aquarium backgrounds, on the other hand, are placed inside the tank, submerged in the water. These are less common for printed scenes and more often seen as 3D backgrounds made from materials like resin, fiberglass, or foam, designed to mimic rock formations, tree roots, or other natural landscapes. Attaching these requires a different approach. Since they are submerged, the material must be completely aquarium-safe and non-toxic to your fish and plants. Attachment typically involves aquarium-safe silicone sealant or sometimes suction cups for smaller, lighter pieces. The benefit of internal backgrounds is their realistic, immersive effect, creating true depth within the tank. However, they can take up valuable swimming space, accumulate algae, and be more challenging to clean or remove. When considering how to install aquarium background internally, always ensure the product is specifically designed for aquatic use and follow the manufacturer’s instructions meticulously to ensure the safety of your aquatic ecosystem.
Understanding this distinction is the first critical step in choosing the right materials and techniques for how to attach aquarium background for your particular setup. Most of the methods we’ll discuss in detail will focus on external backgrounds due to their popularity and ease of use.
How to Attach an Aquarium Background Using Static Cling

For many aquarists, learning how to attach an aquarium background with static cling is the easiest and most user-friendly method. Static cling backgrounds are popular because they require no messy adhesives, making them simple to apply and, more importantly, effortless to remove or reposition. They adhere to the glass using static electricity, creating a bond that’s strong enough to hold the background in place but gentle enough to peel off without residue.
Preparing for Application
Before you begin, ensure your aquarium’s back glass is immaculately clean. Any dust, fingerprints, or water spots will show through the background and prevent proper adhesion. Use a glass cleaner (preferably one specifically designed for aquariums, or simply warm water with a clean microfiber cloth) to thoroughly clean the outside of the tank. Wipe it dry completely, leaving no streaks.
Next, you’ll need to prepare the static cling background itself. Lay it flat on a clean surface. Using a sharp utility knife or scissors and a straight edge, carefully trim the background to the exact dimensions of your aquarium’s back panel. Measure twice, cut once! A precise fit will look much more professional.
Step-by-Step Guide for Applying Static Cling Backgrounds
- Spray the Glass: Lightly mist the entire outer surface of the aquarium’s back glass with water. You don’t want it dripping, just a fine, even layer of moisture. Some aquarists prefer a mixture of water and a tiny drop of dish soap (like a single drop in a spray bottle of water) to help with repositioning, but plain water often works just fine. The water acts as a temporary lubricant, allowing you to slide the background into place and helping to eliminate air bubbles.
- Peel and Position: Carefully peel a small section of the backing paper from the top edge of the static cling background. Align this top edge with the top edge of your aquarium’s back glass. This initial alignment is crucial for a straight application.
- Smooth Downwards: Once the top edge is aligned and gently adhered, slowly peel off more of the backing paper as you simultaneously smooth the background downwards onto the wet glass. Use a squeegee (a plastic one designed for window tinting or vinyl application works perfectly), a credit card, or even a clean, soft cloth. Start from the center and work your way outwards, pushing any water and trapped air bubbles towards the edges. Apply steady, even pressure.
- Work Out Bubbles: As you continue to smooth, pay close attention to any air bubbles that form. The water underneath allows you to push these bubbles out. If a stubborn bubble persists, you can gently lift a small section of the background near the bubble and re-apply, working it out. Don’t be afraid to mist more water if the surface starts to dry out while you’re working.
- Trim Excess (if needed): If you didn’t get a perfect cut initially, now is the time to trim any slight excess from the edges with your utility knife, using the tank’s frame as a guide.
- Final Smoothing: Once the entire background is applied, give it a final, thorough pass with your squeegee, ensuring all remaining water and bubbles are pushed out. Wipe away any excess water from the tank’s glass.
Tips for Avoiding Bubbles and Ensuring a Smooth Finish
The key to a flawless static cling application is the generous use of water and a good squeegee. Don’t skimp on the water mist, as it’s your best friend for repositioning and pushing out bubbles. Work slowly and methodically, constantly smoothing as you peel the backing. If you find large air bubbles, it’s usually easier to gently peel back the background to just before the bubble, re-mist, and re-apply, rather than trying to force a large bubble out over a long distance. With a little patience, you’ll achieve a perfectly smooth, bubble-free finish that truly makes your aquarium pop, making static cling one of the easiest answers to how to attach aquarium background.
Using Gel or Glycerin to Attach Aquarium Backgrounds
When you’re aiming for that deeply rich, vibrant, and perfectly seamless look for your aquarium background, using aquarium background gel or glycerin is often the preferred method. These clear, viscous liquids are specifically designed for how to attach aquarium background externally, eliminating air gaps and creating an optical bond that makes the background appear almost painted onto the glass. This method is incredibly popular among professional aquascapers for its superior aesthetic results.
What Gel/Glycerin Does (Creates a Seamless Look)
The magic of gel or glycerin lies in its ability to fill the tiny air gap that would otherwise exist between the background material and the aquarium glass. Air pockets cause light to refract unevenly, leading to a dull, washed-out appearance and visible air bubbles. When you apply a thin layer of gel or glycerin, it effectively becomes an intermediary medium that eliminates these air pockets. The result is a background that appears clearer, with colors that are more saturated and a depth that truly enhances the tank’s visual appeal, giving a “wet” or “laminated” look. This is especially effective for printed backgrounds with detailed scenes or vibrant colors.
Instructions on How to Apply and Smooth It Out
- Clean the Glass Thoroughly: Just like with static cling, the cleanliness of your aquarium’s back glass is paramount. Any dust, grease, or smudges will be magnified once the gel is applied. Use a dedicated glass cleaner or warm water with a clean, lint-free cloth to ensure the surface is spotless and completely dry.
- Prepare the Background: Lay your background flat and trim it precisely to the outer dimensions of your aquarium’s back panel. Accuracy here is key for a professional finish.
- Apply the Gel/Glycerin: Squeeze a generous amount of aquarium background gel or glycerin directly onto the back glass of your aquarium. Don’t be shy; you want enough to cover the entire surface adequately. A good starting point is a zig-zag pattern or several dots.
- Spread Evenly: Using a clean, dry cloth, paper towel, or a squeegee, gently spread the gel/glycerin across the entire back surface of the glass. You want a thin, even layer. Avoid making it too thick, as excess will just squish out. The goal is complete, uniform coverage.
- Position the Background: Carefully take your trimmed background and align one of its top corners with the corresponding corner of the aquarium glass. Slowly and steadily lower the rest of the background onto the gel-covered glass. Try to avoid letting it simply flop down; a controlled placement will minimize trapped air.
- Smooth Out Bubbles: This is the most critical step for a professional finish. Starting from the center of the background, use a squeegee (a plastic or felt-edged one is ideal to prevent scratching the background) or a firm, flat object like a credit card wrapped in a soft cloth. Apply firm, even pressure and push outwards towards all four edges. The goal is to force out any trapped air bubbles and excess gel. Work systematically, overlapping your strokes. You’ll see the bubbles and excess gel moving towards the edges.
- Clean Excess Gel: As you push, some gel will inevitably seep out from the edges of the background. Immediately wipe this away with a clean, damp cloth or paper towel. If left to dry, it can become sticky or leave a residue.
- Final Touches: Once you’ve smoothed out all visible bubbles and wiped away the excess, give the background a final inspection. If you spot any tiny bubbles, try to work them towards the edge again. The gel may take a few hours to completely settle and provide its full optical clarity.
Discuss Common Issues Like Air Bubbles and How to Fix Them

The most common issue when using gel or glycerin is trapped air bubbles. These occur when the gel isn’t evenly spread or when the background is applied too quickly. If you see large, stubborn bubbles:
- Re-lift and Re-apply: For significant bubbles, it’s often best to gently peel back the background from the affected area, re-spread a tiny bit more gel if needed, and then re-apply, smoothing out more carefully.
- Needle Prick (Last Resort): For very small, persistent bubbles that won’t budge, some aquarists carefully use a very fine needle to prick a tiny hole in the background material over the bubble, then squeegee the air out. Be extremely cautious if attempting this, as it can damage the background permanently.
Another issue can be uneven gel distribution, leading to patchy areas where the background doesn’t look as vibrant. This is why spreading the initial layer evenly is so important.
With a little practice, using gel or glycerin is a fantastic way to achieve a truly professional, bubble-free, and stunning appearance for your aquarium, answering what to use to attach aquarium background for superior results.
Tape Methods: When and How to Use Them for Aquarium Backgrounds
When you’re exploring how to attach aquarium background with simplicity and ease of removal in mind, tape methods often come to the forefront. While perhaps not offering the seamless, “wet look” of gel, tape is a practical, widely available, and effective solution for many external backgrounds, especially if you anticipate changing your background relatively frequently.
Different Types of Tape
Not all tapes are created equal when it comes to attaching an aquarium background. Choosing the right kind can make a significant difference in both appearance and durability.
- Clear Packing Tape: This is perhaps the most common and accessible option. Its transparency allows the background design to show through, and it’s generally strong enough to hold most lightweight backgrounds. However, standard packing tape can sometimes show wrinkles or bubbles underneath, and its adhesive might degrade over time, especially with exposure to humidity or temperature fluctuations around the tank.
- Specialized Aquarium Background Tape: Some aquarium product manufacturers offer tapes specifically designed for backgrounds. These are often extra clear, more resistant to moisture, and engineered for better long-term adhesion to glass. They might be a bit more expensive but can offer a more reliable and aesthetically pleasing result.
- Masking Tape/Painter’s Tape (for temporary hold): While not ideal for permanent attachment due to their opaque nature and weaker adhesive, these can be useful for temporarily holding a background in place while you apply a more permanent solution like gel, or if you’re just testing out a look. They are easily removable and won’t leave residue.
Best Practices for Tape Application to Prevent Peeling or Moisture Issues
The key to successful tape application for how to put background on fish tank is cleanliness and proper technique.
- Clean and Dry the Glass: This step cannot be overstated. The back of your aquarium glass must be perfectly clean and completely dry before applying any tape. Use a glass cleaner or warm water and a clean, lint-free cloth. Any dust, grease, or moisture will compromise the tape’s adhesive, leading to peeling and frustration.
- Trim the Background Precisely: Just like with other methods, cut your background to the exact dimensions of the back of your aquarium. A poorly fitted background will be harder to tape securely and will look sloppy.
- Strategic Tape Placement:
- Edges Only: For most printed backgrounds, you’ll want to apply tape along all four edges. Start with the top edge, aligning the background carefully. Apply a continuous strip of clear tape along the entire top edge, overlapping about half an inch onto the background and half an inch onto the glass.
- Side Edges: Once the top is secure, work your way down the side edges. Pull the background taut as you apply the tape to minimize wrinkles.
- Bottom Edge: Finish with the bottom edge. Ensure the background is flat against the glass before applying the final strip of tape.
- Avoid Overlapping Background: Try to avoid taping across the main design area of the background itself, as this can create visible lines or wrinkles. The goal is to secure the edges to the glass.
- Smooth and Press Firmly: After applying each strip of tape, use your fingers or a squeegee to firmly press down along the entire length of the tape. This ensures maximum contact between the adhesive and both the background and the glass, expelling any tiny air bubbles that could weaken the bond.
- Consider Vertical Strips (Optional): For larger backgrounds or if you’re concerned about sagging, you can add a few vertical strips of tape down the middle of the background, connecting the top and bottom edges. Again, try to use clear tape and place it discreetly if possible.
Preventing Peeling and Moisture Issues
- Dry Environment: Ensure the area where your aquarium is located isn’t excessively humid, as this can degrade tape adhesive over time.
- Cleanliness is King: Reiterate: a perfectly clean and dry surface before application is the single most important factor in preventing premature peeling.
- Smooth Application: Wrinkles in the background or bubbles under the tape create weak points where moisture can ingress or the adhesive can lose its grip. Take your time to apply it smoothly.
- Regular Checks: Periodically check the edges of your taped background. If you see any signs of peeling, you can gently lift the affected area, clean it, and re-tape.
While tape might not offer the ultimate seamless finish of gel or static cling, it’s a very practical and effective answer to how to attach aquarium background for those looking for simplicity and easy changes.
Attaching Dry or Self-Adhesive Aquarium Backgrounds

Among the various options for how to install aquarium background, dry or self-adhesive types offer a convenient, mess-free application. These backgrounds come with an adhesive layer already applied to one side, protected by a peel-off backing. They are designed for a straightforward, stick-on process, making them an appealing choice for aquarists who want a quick and clean setup.
Instructions for Backgrounds with Pre-Applied Adhesive
Using a self-adhesive background is similar to applying a large sticker. The key is precision and patience to avoid bubbles and ensure proper alignment.
- Thorough Glass Preparation: As with all background application methods, start with a spotless and completely dry aquarium back glass. Any dust, lint, or smudges will be trapped beneath the background, ruining the appearance. Use a quality glass cleaner or warm water with a clean, lint-free cloth, then dry thoroughly.
- Precise Trimming: Carefully measure the exact dimensions of your aquarium’s back panel. Lay the self-adhesive background flat on a clean, stable surface and use a straight edge and a sharp utility knife to trim it precisely to size. An accurate cut is crucial for a professional finish.
- Peel a Small Section: Do not peel off the entire backing at once. This is a common mistake that leads to frustration and bubbles. Instead, carefully peel back only a small section of the backing paper, perhaps 1-2 inches, along one of the shorter edges (e.g., the top edge). Fold the peeled backing paper back to create a crease, making it easier to hold.
- Align and Start Adhering: Carefully align the exposed adhesive edge of the background with the corresponding edge of your aquarium’s back glass. Take your time to ensure it’s perfectly straight. Once aligned, gently press this small exposed section onto the glass, ensuring good initial adhesion.
- Slowly Peel and Smooth: This is the most critical part of the process. While holding the background slightly away from the glass with one hand, slowly and gradually pull the backing paper downwards with your other hand. As you peel, immediately use a squeegee (a plastic or felt-edged one is highly recommended to avoid scratching the background) or a firm, flat object like a credit card. Starting from the center of the applied section, firmly and steadily push outwards towards the edges. This action simultaneously adheres the background and pushes out any trapped air bubbles.
- Work Systematically: Continue this process: peel a small section of the backing, then smooth. Peel, then smooth. Work your way down the entire length of the background. Overlap your squeegee strokes to ensure you cover every inch.
- Address Bubbles: If you notice bubbles forming, don’t panic. If they’re small, you can often push them towards the nearest edge with your squeegee. For larger, stubborn bubbles, gently lift the background back to just before the bubble, re-align, and re-apply, ensuring you smooth more carefully this time. Do this immediately, as the adhesive sets as it dries.
- Final Press: Once the entire background is adhered, give it a final, firm pass with your squeegee over the entire surface, paying extra attention to the edges, to ensure maximum adhesion and eliminate any remaining tiny bubbles.
Tips for Precise Alignment and Bubble Removal
- Take Your Time: Rushing is the enemy of a bubble-free, perfectly aligned dry background. Work slowly and methodically.
- Use a Helper: For larger aquariums, having a second person to help hold and align the background can make the process significantly easier.
- The “Hinge” Method: For very large backgrounds, some pros use a “hinge” method. After cleaning the glass and trimming the background, tape the top edge of the background to the top edge of the aquarium with painter’s tape (this is your hinge). Then, peel the backing paper off from the bottom upwards, fold it over the top edge, and let the background fall naturally onto the glass. Then use your squeegee from the top down. This ensures perfect alignment from the start.
- Microfiber Cloth for Pressure: If you don’t have a squeegee, a folded microfiber cloth can work, but a squeegee provides more consistent and even pressure.
- Prick Tiny Bubbles (Last Resort): For very tiny, stubborn air bubbles that refuse to be pushed out, you can carefully use a very fine needle to prick a minuscule hole in the center of the bubble. Then, gently push the air out towards the hole with your thumb. Be extremely cautious as this can damage the background permanently.
Attaching a dry or self-adhesive aquarium background might seem daunting at first, but with patience and the right technique, you’ll achieve a clean, smooth, and professional finish that truly elevates the look of your tank. This method is an excellent answer to how to attach aquarium background for those seeking a durable, long-lasting solution.
DIY Tips for a Seamless Aquarium Background
Achieving a seamless, professional-looking aquarium background isn’t just about choosing the right material; it’s also about meticulous preparation and smart application techniques. Whether you’re using static cling, gel, or a self-adhesive option, these DIY tips will help you perfect how to attach aquarium background and elevate your tank’s aesthetics.
Advice on Preparing the Glass
The foundation of any successful background application is a flawlessly clean surface. This cannot be stressed enough.
- Sparkling Clean: Before you even unroll your background, clean the exterior of your aquarium’s back glass thoroughly. Use a dedicated glass cleaner that is ammonia-free, or simply warm water with a clean, lint-free microfiber cloth. Ammonia-based cleaners can leave residues that can affect adhesive or even harm fish if fumes enter the tank.
- No Streaks, No Dust: After cleaning, use a dry, clean microfiber cloth to buff the glass until it’s completely streak-free and dry. Hold the tank up to a light source to check for any lingering dust particles or smudges. Even tiny imperfections will show through once the background is applied.
- Degrease if Necessary: If your tank has been handled a lot or has oily residue (from fingers, etc.), a small amount of rubbing alcohol on a clean cloth can be used to degrease the glass. Ensure it completely evaporates before applying the background.
Techniques for Cutting the Background to Size
A precise cut is crucial for a professional look. A background that’s too large will wrinkle or buckle, while one that’s too small will leave unsightly gaps.
- Accurate Measurement: Measure the height and width of your aquarium’s back glass panel with a tape measure. Measure twice to ensure accuracy.
- Flat, Clean Surface: Lay your background material flat on a large, clean, and stable surface that you don’t mind potentially cutting into (or use a self-healing cutting mat).
- Straight Edge and Utility Knife: Place a long, sturdy straight edge (a metal ruler or yardstick works best) along your measured cut lines. Use a sharp utility knife or craft knife (X-Acto knife) to score and cut the background. Apply firm, even pressure. Multiple light passes are better than one heavy pass that can tear the material.
- Don’t Rush: Take your time cutting. A jagged edge will be very noticeable. If you’re cutting a roll, ensure it’s completely uncurled and flat.
Troubleshooting Common Attachment Problems
Even with the best preparation, you might encounter some common issues when learning how to attach aquarium background.
- Air Bubbles:
- Prevention: The best way to deal with bubbles is to prevent them. This means thoroughly cleaning the glass, using enough liquid (for static cling/gel methods), and applying the background slowly and methodically with a squeegee from the center outwards.
- Fixing (Gel/Static Cling): For minor bubbles, gently push them towards the nearest edge with your squeegee. For larger, stubborn bubbles, carefully lift the background back to just before the bubble, re-mist the glass (for static cling) or re-spread gel, and then re-apply and smooth.
- Fixing (Self-Adhesive/Dry): These are harder to fix once adhered. If a bubble is small and persistent, a very fine needle can be used to prick a tiny hole, allowing you to push the air out. This is a last resort as it creates a permanent mark.
- Crooked Application:
- Prevention: Always start by aligning one edge (usually the top or a side) perfectly straight with the aquarium frame. Use the tank’s edges as your guide. For large backgrounds, use painter’s tape to create a temporary “hinge” at the top before peeling the backing, ensuring perfect initial alignment.
- Fixing: For tape or static cling backgrounds, you can often gently peel back the entire background and re-apply it. For gel, you might be able to slide it if it’s still wet. For self-adhesive, it’s very difficult once the adhesive has made strong contact; prevention is key here.
- Wrinkles/Creases:
- Prevention: Ensure the background material is stored flat or unrolled well in advance to remove any creases. When applying, pull the material taut as you go, especially with tape methods.
- Fixing: Wrinkles are very hard to remove once they’re set. If it’s a static cling or taped background, you might be able to gently lift and re-smooth. For gel or self-adhesive, if a crease is pressed in, it’s likely permanent.
By following these DIY tips, you’ll significantly increase your chances of achieving a flawless and long-lasting aquarium background that truly enhances your aquatic display, demonstrating expertise in how to install aquarium background.
Removing an Old Aquarium Background
Eventually, you might decide to change your tank’s aesthetic, or perhaps your current background has seen better days. Knowing how to remove an old aquarium background safely and without damaging your tank is just as important as knowing how to put it on. The removal process largely depends on the method used for attachment.
Instructions for Safely Removing Different Types of Backgrounds
- Tape-Attached Backgrounds:
- Peel Carefully: Start by gently lifting a corner of the tape at the top or side of the background.
- Slow and Steady: Once you have a grip, slowly and steadily peel the tape off the glass and the background. Try to pull at a shallow angle rather than straight up, as this reduces the chance of leaving adhesive residue.
- Remove Background: Once all the tape is removed, the background itself will simply come off.
- Residue: You might be left with sticky residue on the glass.
- Gel or Glycerin Backgrounds:
- Peel from a Corner: These backgrounds are usually quite easy to remove. Find a corner and gently start peeling the background away from the glass.
- Clean Up Gel: As you peel, you’ll notice the gel or glycerin residue on the glass. It might be slightly slimy or tacky. This is easily wiped away with a clean, damp cloth or paper towel.
- Stubborn Areas: If any spots are particularly stubborn, a plastic scraper (like a credit card or a specialized aquarium scraper) can help.
- Static Cling Backgrounds:
- Simply Peel: These are the easiest to remove. Just grab a corner and gently peel the background off the glass.
- No Residue: One of the main benefits of static cling is that it leaves absolutely no residue behind, making cleanup a breeze.
- Self-Adhesive (Dry) Backgrounds:
- More Challenging: These are generally the most difficult to remove due to their strong, permanent adhesive.
- Heat Application (Caution!): Carefully apply gentle heat with a hairdryer on a low setting to the outside of the glass where the background is adhered. The heat can soften the adhesive, making it easier to peel. Be extremely cautious with heat; never overheat the glass, as sudden temperature changes can crack an empty tank. Keep the hairdryer moving and apply heat for only short bursts.
- Peel Slowly: Once the adhesive is warm, try to lift a corner with a plastic scraper or your fingernail. Slowly and steadily pull the background away from the glass. If it resists, apply more gentle heat.
- Residue: Expect significant adhesive residue.
Tips for Cleaning the Glass Afterward
After removing any background, especially those attached with tape or self-adhesive, you’ll likely have some residue left on your aquarium glass. This needs to be thoroughly cleaned before applying a new background or simply leaving the tank bare.
- For Tape/Gel Residue:
- Warm, Soapy Water: A solution of warm water and a small amount of dish soap can often break down tape and gel residue. Apply it to the residue, let it sit for a few minutes, then scrub with a clean sponge or cloth.
- Rubbing Alcohol/Acetone (External Use Only!): For more stubborn tape residue, rubbing alcohol (isopropyl alcohol) or even a small amount of acetone (nail polish remover) on a paper towel can be highly effective. Only use these on the outside of the tank glass. Apply a small amount to a cloth and wipe the residue away. Follow up with a thorough rinse of the area with plain water and wipe dry to remove any chemical traces.
- Plastic Scraper: A plastic razor blade or a credit card can be used to gently scrape away softened residue without scratching the glass. Avoid metal razor blades unless you are very experienced and know how to avoid scratching.
- For Self-Adhesive Residue:
- Adhesive Removers: Products like Goo Gone (ensure it’s the original formula, not citrus-based, and apply only to the exterior) or specialized adhesive removers can be very effective. Apply sparingly to a cloth, wipe the residue, and then immediately clean the area thoroughly with soap and water to remove all traces of the remover.
- Heat + Scrape: The combination of gentle heat and careful scraping with a plastic razor blade is often the most effective for truly stubborn adhesive.
Always ensure the tank is completely dry and free of any cleaning product residue before refilling or reattaching a new background. Proper removal and cleaning are essential steps in maintaining your aquarium, ensuring the next phase of your tank’s aesthetic journey begins with a clean slate.
FAQs About Attaching Aquarium Backgrounds
Here are some frequently asked questions about how to attach aquarium background, providing quick, direct answers to common concerns.
Are aquarium background adhesives safe for fish?
Yes, if used externally and allowed to cure/dry completely, or if designed for internal use (which is rare for printed backgrounds and usually only for 3D inserts). Most external methods like static cling, gel, oil, or tape pose no direct risk to your fish as they are applied to the outside of the tank glass and do not come into contact with the water. For internal 3D backgrounds, only use products explicitly labeled as “aquarium safe” silicone or resin. Always allow ample cure time for any adhesives or silicones before filling the tank with water or adding livestock.
Can I use regular household glue for an aquarium background?
No, it’s generally not recommended. Regular household glues are typically not designed for long-term adhesion to glass in humid environments, and many contain chemicals that could be toxic to your fish if fumes somehow entered the tank or if the glue came into contact with water. Stick to methods specifically designed for aquarium backgrounds, such as specialized gel, static cling, or appropriate tape.
How long does it take for an aquarium background to dry?
The “drying” time depends entirely on the attachment method:
- Static Cling: Instantaneous. As soon as you smooth out the water and bubbles, it’s done.
- Gel/Glycerin: While the initial application is immediate, it can take a few hours for the gel to fully settle and provide its maximum optical clarity, as any remaining micro-bubbles disperse.
- Tape: Instantaneous for adhesion, but the long-term durability of the tape will depend on the environment.
- Self-Adhesive (Dry): The initial bond is immediate upon pressing, but the adhesive typically undergoes a curing process that can take 24-48 hours to reach its full strength. Avoid disturbing it during this time.
Will an aquarium background prevent algae growth on the back glass?
An opaque background can certainly help reduce algae growth on the back glass. By blocking light from hitting the back surface of the glass, it deprives algae of a primary energy source, making it harder for them to photosynthesize and grow there. However, it won’t prevent algae growth entirely throughout the tank, especially if other factors like nutrient levels and overall lighting are conducive to algae.
Final Thoughts: Enhancing Your Aquarium with the Perfect Background
Mastering how to attach an aquarium background is a simple yet incredibly impactful way to elevate your tank’s aesthetics and create a natural, immersive habitat for your fish. A well-chosen and expertly applied background can hide unsightly wires, add depth and dimension to your aquascape, and truly transform your aquarium into a captivating focal point in any room.
Whether you opt for the versatile static cling aquarium background, the professional sheen of a gel for aquarium background, or the convenience of a dry aquarium background, the key to success lies in meticulous preparation and patient application. Always remember to thoroughly clean and dry the glass, precisely cut your background, and take your time to smooth out any air bubbles for a flawless finish.
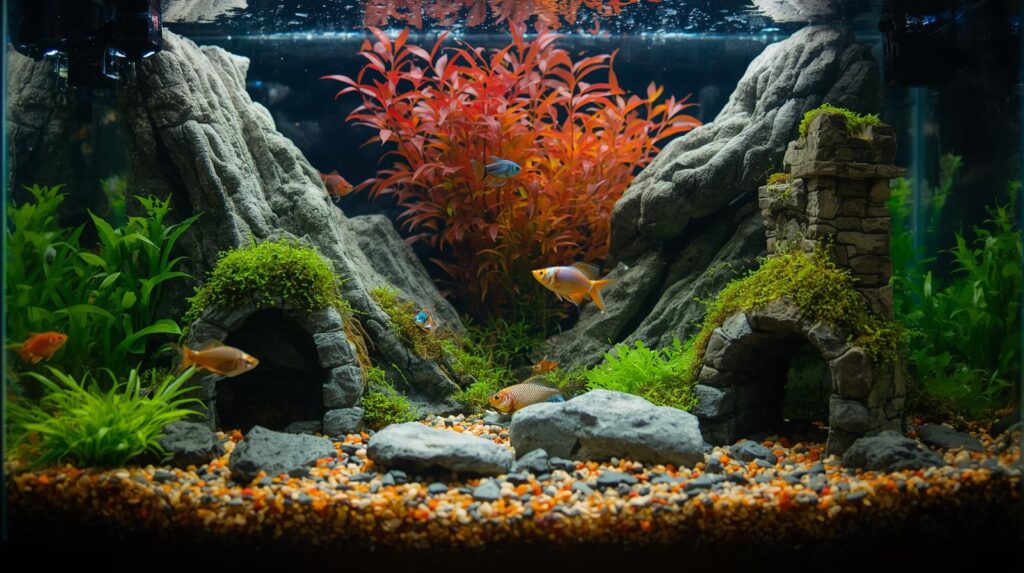
Choosing a background that complements your tank’s inhabitants and decor is also crucial. A lush green background can make tropical fish pop, while a rocky scene can enhance a cichlid tank. Always ensure the glass is clean before application, and take your time to prevent bubbles and achieve a flawless finish. By following these guidelines, you’ll not only learn how to attach background to aquarium like a pro but also unlock the full visual potential of your aquatic world. What kind of scene will you create for your fish today?